PowerShell code signing (course 10961B)
On LON-DC1
Install the full UI.
Install-WindowsFeature User-Interfaces-Infra –IncludeAllSubFeature
Install-WindowsFeature User-Interfaces-Infra –IncludeAllSubFeature
Restart.
Install AD Certificate Services.
Install-WindowsFeature AD-Certificate, ADCS-Cert-Authority –IncludeManagementTools
Install-WindowsFeature AD-Certificate, ADCS-Cert-Authority –IncludeManagementTools
Server Manager, Post-deployment
Configuration.
Create an Enterprise Root CA called “ADatum CA”.
Create an Enterprise Root CA called “ADatum CA”.
Run Certification Authority management
tool.
Right click Certificate Templates, choose
Manage.
Right-click Code Signing, choose Duplicate
Template.
General tab, Template display name “Code Signing II”.
Request Handling tab, select Allow private key to be exported.
Click OK.
General tab, Template display name “Code Signing II”.
Request Handling tab, select Allow private key to be exported.
Click OK.
Close Manage Templates.
Switch to Certification Authority
management tool.
Right click Certificate Templates, choose
New Certificate template to Issue.
Code Signing II.
Code Signing II.
On LON-CL1
Start, Run, certmgr.msc.
Right-click Personal, choose All Tasks,
Request New Certificate.
Select Certificate Enrollment Policy page, click Next.
Request Certificates page, select Code Signing II, click Enroll.
Select Certificate Enrollment Policy page, click Next.
Request Certificates page, select Code Signing II, click Enroll.
Open Personal \ Certificates.
Right-click the certificate with a template
of Code Signing II, choose Copy.
Right-click Trusted Publishers, choose Paste.
Note: In practice you should use Group Policy to distribute the Trusted Publisher certificate, probably to machines' certificate stores.
Right-click Trusted Publishers, choose Paste.
Note: In practice you should use Group Policy to distribute the Trusted Publisher certificate, probably to machines' certificate stores.
Run a PowerShell prompt.
cd CERT:\CurrentUser\my
$CSCert = (dir -CodeSigningCert)[0]
Set-AuthenticodeSignature -Certificate $CSCert -FilePath E:\Democode\
cd CERT:\CurrentUser\my
$CSCert = (dir -CodeSigningCert)[0]
Set-AuthenticodeSignature -Certificate $CSCert -FilePath E:\Democode\
If the signing is successful then you will see something similiar to the following.
SignerCertificate Status Path
----------------- ------ ----
84623FD8D796C6E722DE330B4DDFD6FEB01AF412 Valid Demo-Signing2.ps1
Remotely administering Hyper-V with WinRM
Hyper-V in Windows 10 and Server 2016 uses WinRM for remote management.
In order to remotely manage a machine that is not in the same domain as the client, the server's name or IP address must be added to TrustedHosts on the client and CredSSP authentication must be configured on both machines.
On the server:
In order to remotely manage a machine that is not in the same domain as the client, the server's name or IP address must be added to TrustedHosts on the client and CredSSP authentication must be configured on both machines.
On the server:
Enable-PSRemoting # On by default in Windows Server.
Enable-WSManCredSSP -Role server
On the client:
$HVHost = "172.29.203.25"
$TH = Get-Item WSMan:\localhost\Client\TrustedHosts | select -ExpandProperty value
if ( $TH.Length -eq 0 )
{ $TH = $HVHost }
else
{ $TH += ",$HVHost" } # A comma-separated list.
{ $TH = $HVHost }
else
{ $TH += ",$HVHost" } # A comma-separated list.
Set-Item WSMan:\localhost\Client\TrustedHosts -Value $TH
Enable-WSManCredSSP -Role client -DelegateComputer $HVHost
From Hyper-V Manager, connect to server. Enter the server's name or IP address and click the Set User button to enter an administrative username and password.
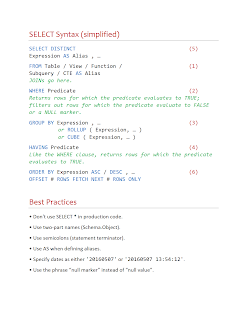
SQL Querying (courses 20461, 20462, 20761, 20762, 10985)
Books I've Read and Recommended
T-SQL Fundamentals (https://www.mightyape.co.nz/product/t-sql-fundamentals/24946232) (https://www.barnesandnoble.com/w/t-sql-fundamentals-itzik-ben-gan/1123454797?ean=9781509302000)T-SQL Querying (the next book after Fundamentals) (https://www.mightyape.co.nz/product/t-sql-querying/22612292) (https://www.barnesandnoble.com/w/t-sql-querying-itzik-ben-gan/1119958056?ean=9780735685048)
T-SQL Window Functions (https://www.mightyape.co.nz/product/t-sql-window-functions/31121942)
Joe Celko's SQL Programming Style (https://www.mightyape.co.nz/product/joe-celkos-sql-programming-style/2007807)
Any book by Joe Celko. :-)
Pro SQL Server Design by Louis Davidson and Jessica Moss (https://www.barnesandnoble.com/w/pro-sql-server-2012-relational-database-design-and-implementation-louis-davidson/1106997676?ean=9781430236962)
Database Design for Mere Mortals by Michael Hernandez (https://www.barnesandnoble.com/w/database-design-for-mere-mortals-michael-j-hernandez/1136968169?ean=9780136788041)
Subscribe to:
Comments (Atom)


